
Purging setup
The PacWizz gives you a consistent, repeatable, automated purge. It records the finish pressure and how long the purge took, then keeps monitoring the tank so you can tell whether the brite is holding pressure before you transfer in.
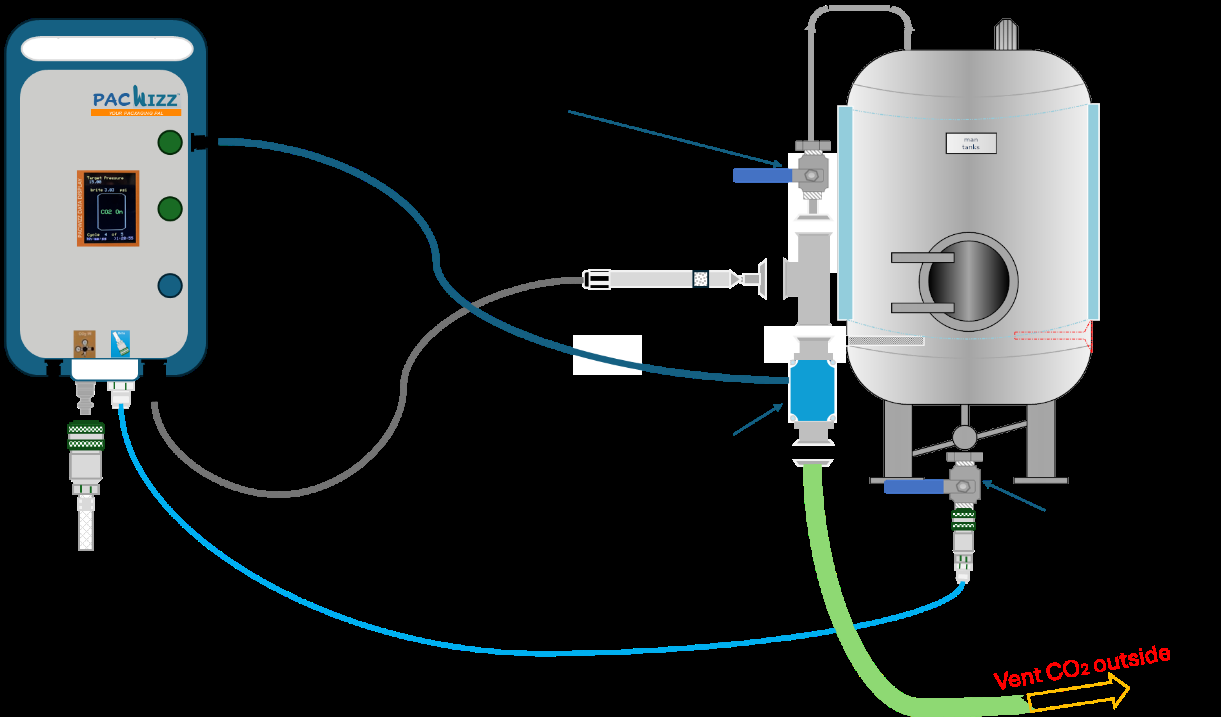
Where to put the RMB
Purge gas leaves the tank through the Remote Motorized Ball-valve (RMB). Mount it on the CIP arm, or permanently somewhere convenient so the gas can be vented outside the building.
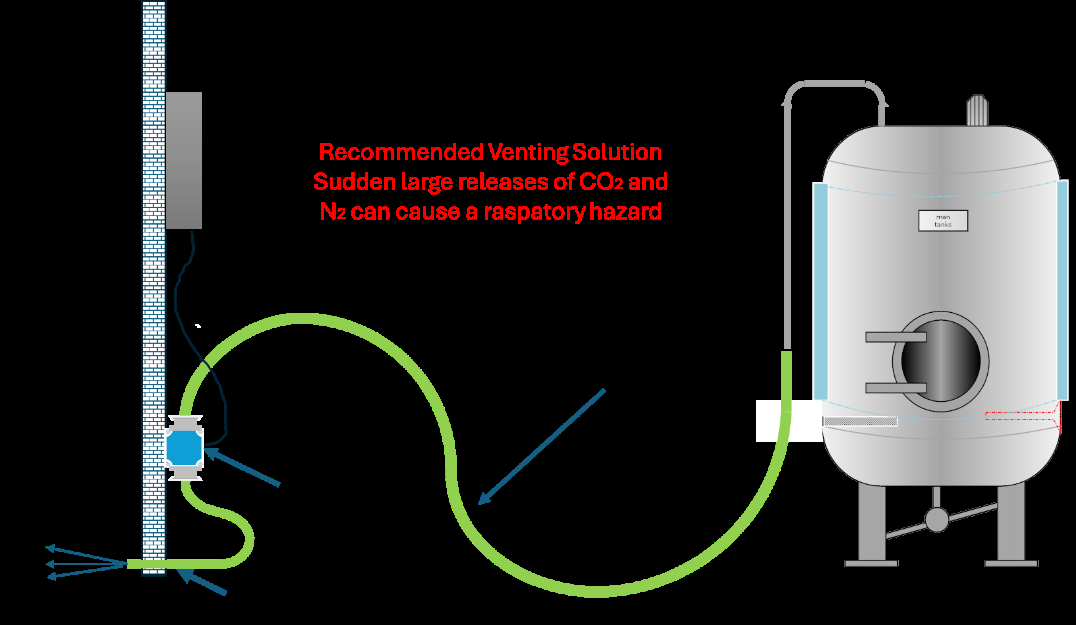
Large CO₂ or N₂ releases can be extremely hazardous. Only purge with proper venting or extraction in place, fit CO₂ alarms, and do not leave the PacWizz purging tanks overnight.
Running a tank purge
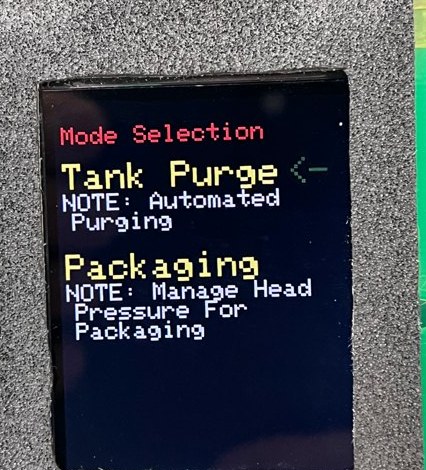 1Select Tank Purge On the Mode Selection screen, move the arrow to Tank Purge and press Enter.
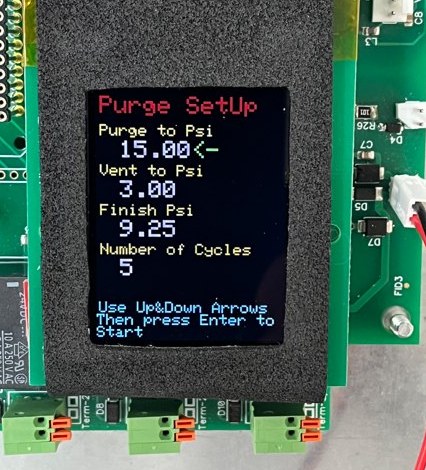 2Set up the purge Use the up and down buttons to change any values, then press Enter to confirm.
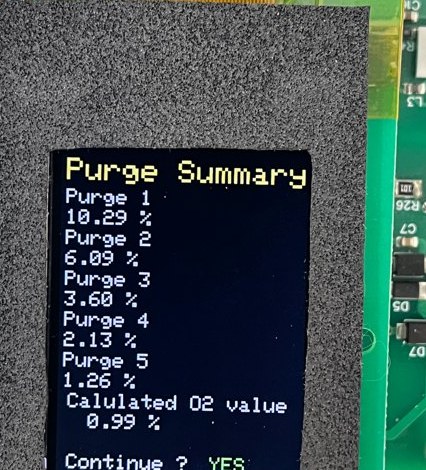 3Check the summary The Purge Summary shows the calculated O₂ for each cycle. Choose YES to start, or NO to go back to Purge SetUp.
Purge SetUp values
| Setting | What it does | Default |
|---|---|---|
| Purge to Psi | The pressure the PacWizz stops at after injecting gas | 15 psi |
| Vent to Psi | The pressure at which the PacWizz stops venting | 3 psi |
| Finish Psi | The pressure it stops at after the last cycle, then holds for the leak integrity test | 9.25 psi |
| Number of Cycles | How many times the PacWizz repeats the purge and vent process | 5 |
The 1-atmosphere dilution method, automated
The PacWizz automates standard purging practice. Each cycle pressurizes the tank with gas and vents it back down, diluting the oxygen left behind. Calculations use your local atmospheric pressure and the pressure applied, and the maths is the same for CO₂, N₂ or beer gas blends.
How long a purge takes
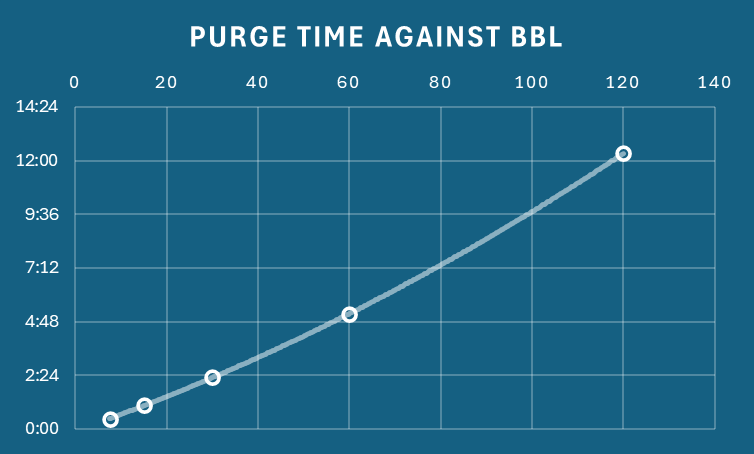
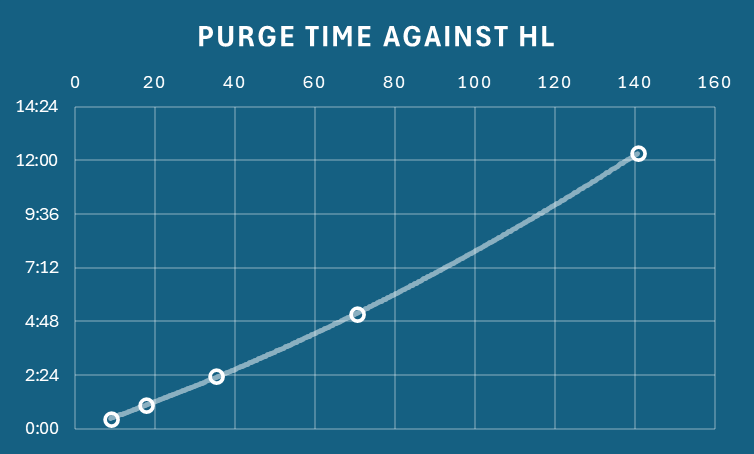
Times depend mostly on how fast your CO₂ regulators can deliver gas at the required pressure and flow. These estimates are for the default purge, using double regulators.
Watch for the low-pressure warning
If the regulator cannot keep up, pressure drops and the PacWizz shows a warning.
Run two regulators
The CO₂-in splitter supplied with the PacWizz lets two regulators feed it at once, which usually fixes the warning.
Throttle the foot valve
Still seeing it? Close the foot isolation valve slightly until the warning clears.
Check the brite for leaks
When the purge finishes, the screen shows the tank pressure at that moment and how long the purge took. The timer keeps running, showing total elapsed time and current tank pressure.
Compare the two and you can tell whether the tank has a small leak that could affect carbonation or conditioning of the beer you transfer in.
A purged tank left on monitor overnight lost 0.57 psi over 13 hours 42 minutes.
0.041 psi lost per hour
The manual carbonation trick
Connect the Brite hose to the carbonation stone and the PacWizz can assist a manual carbonation. Keep the stone isolation valve only slightly open, so CO₂ just trickles through the stone.
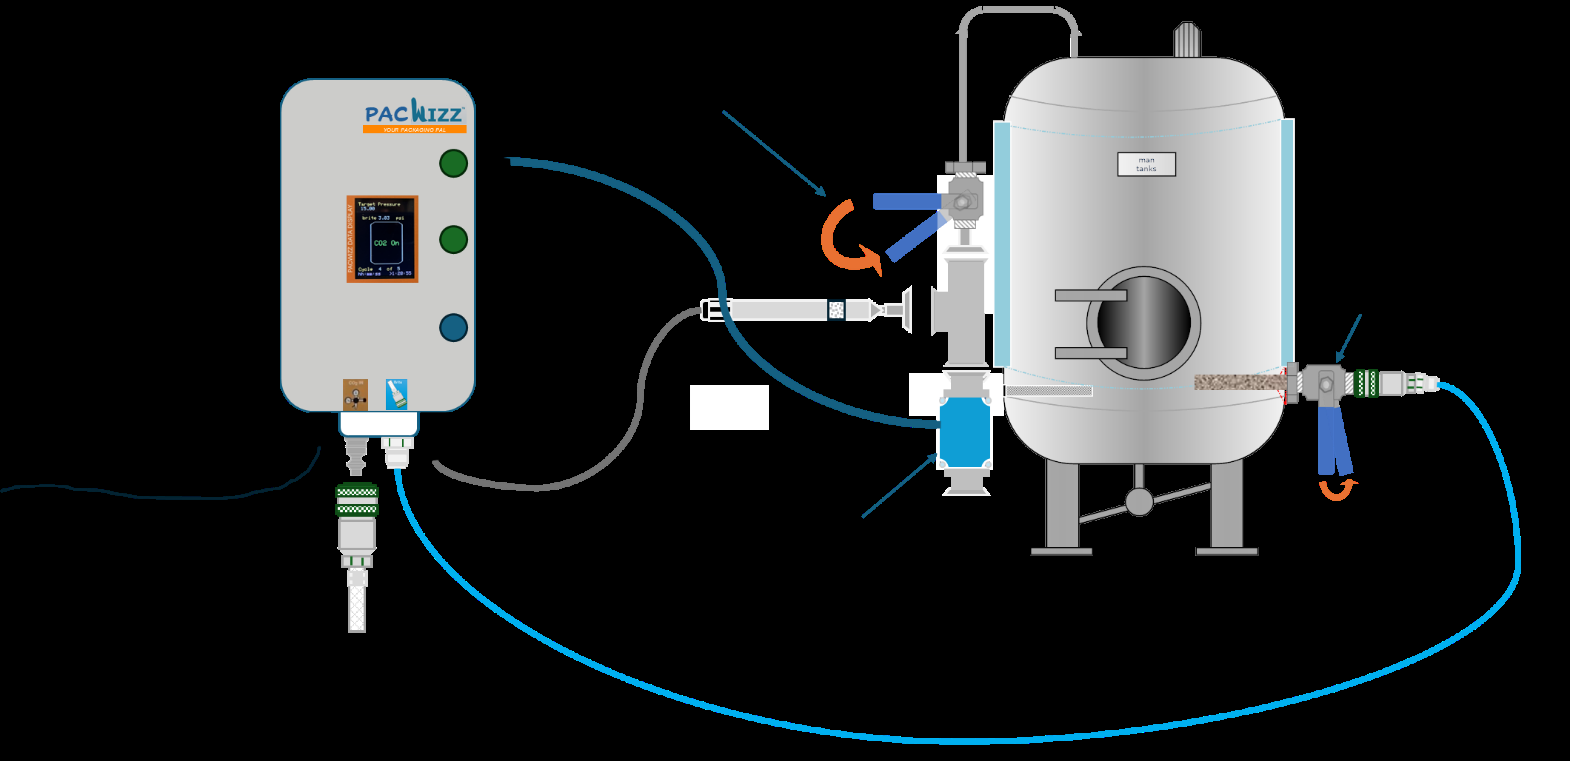
Set the purge sequence to
| Setting | Value |
|---|---|
| Purge to | 3 psi |
| Vent to | 1 psi |
| Finish Psi | 10 psi |
| Number of Cycles | 1 |
At 0 °C (32 °F), as long as the stone's wetted pressure is not exceeded, you should reach about 2.6 volumes. Each extra psi on Finish Psi adds roughly 0.1 volume at that temperature.
Know the limits
- Not recommended for tanks that swing more than about ±2 °C.
- There is no temperature compensation in the calculation.
- The foot sensor is accurate enough for packaging, but carbonation results will vary.
- On the plus side, it makes over-carbonation much less likely.
Working out your own purge procedure?
Call 1 902 874 1348 and ask for the Wizz team. We are happy to talk it through.